How to Setup a Custom Domain Name Registered With Gandi on an Azure Website
- hosting
- gandi
- azure
After a bit of experimentation, I recently decided to transition the hosting of my personal blog from GitHub pages over to an Azure website. To start with I elected to use the default Azure website address extension, which is *your site name here*.azurewebsites.net, while I was getting the site setup. Following a bit of configuration and editing of my site I decided to tackle registering my own custom domain name. A bit later after some searching I selected the domain registrar Gandi to host my custom domain name. When selecting your domain registrar, make sure you select the one that you like, as there are many options out there and you should pick the one you're happy with.
As I hadn't setup a custom domain on Azure before, I decided that it would make an excellent topic for a post. In this post you will find the steps to setup a custom domain names on an Azure website. As stated earlier my custom domain name is registered with Gandi, so if you use a different service the core concepts will probably be similar, but the exact steps might be a bit different.
Step 1: Obtain Azure Website IP Address
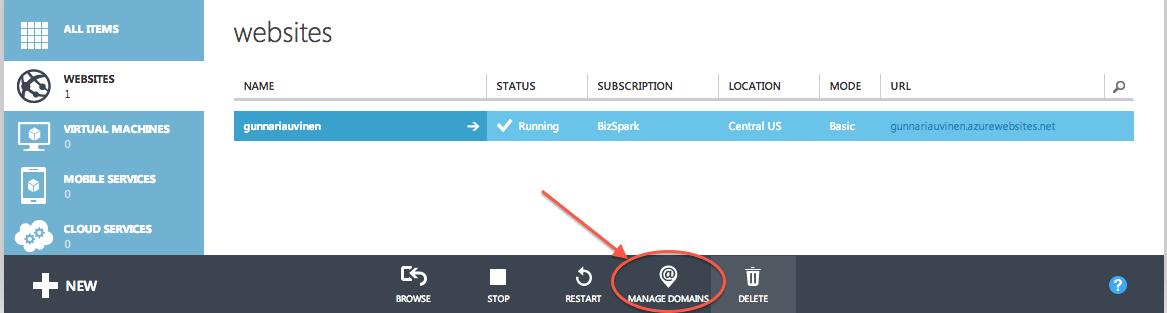
The first thing that needs to be accomplished is to get the IP address of your website on Azure. The first step is to login into Azure and go to the Management Portal. Once in the Management Portal select "Websites" and then select the website that you want to setup the custom domain on right now. Now you want to click on "Manage Domains" as seen in the image below.
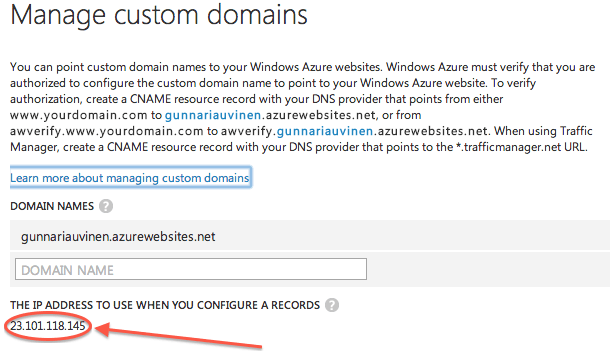
Once you've clicked on that, a "Manage custom domains" window will pop up that has the IP address of your Azure website listed in the lower right hand corner. Make sure to write that number down or copy it to another file temporarily, as you will need it to configure the zone file on Gandi.
Step 2: Create a Copy of the Zone File
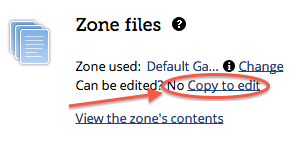
Now that you have the IP address from Azure, you'll need to configure the zone file for your custom domain name on Gandi. Once you've logged into Gandi, you'll want to go to the "Services" tab, then "Domains", and once within "Domains" select the custom domain name that you want to configure. If you haven't edited a Zone file for this custom domain name before, click on the "Copy to edit".
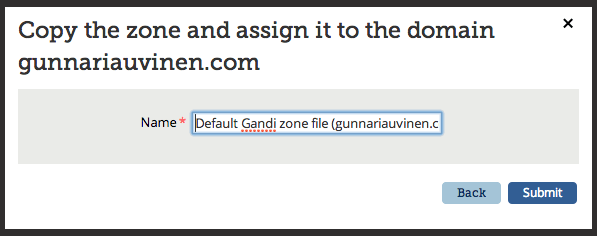
This will bring up a dialogue window where you can rename the copy of the Zone file that you're making. Click "Submit" once you've finished editing the file name.
Step 3: Edit the Zone File
The next step after creating a copy of the Zone file is to then edit that file and add or edit three properties that will configure your custom domain name. You'll need to update the A record, as well as add three CNAME properties. To get started on this click on "Edit the zone".

This will bring up a warning dialogue, where you'll want to select "Create a new version".

This example shows how to edit the Zone file using the "Normal" editing mode on Gandi.

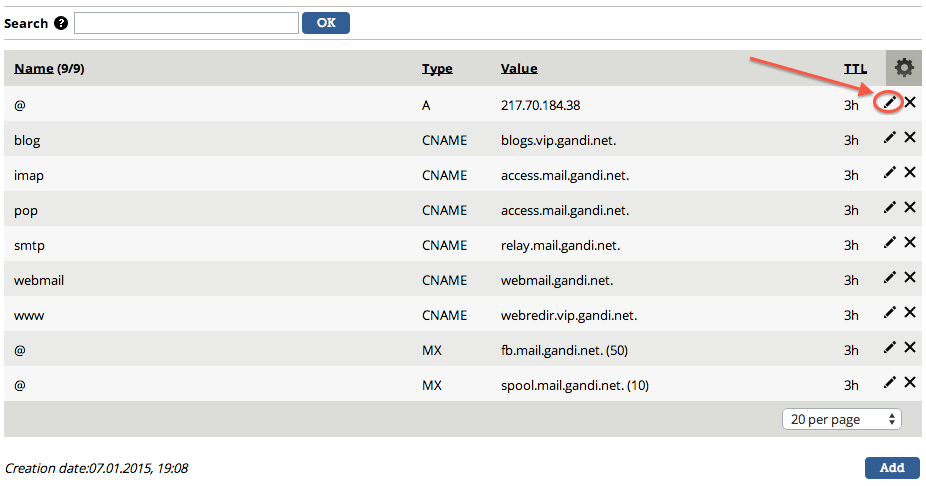
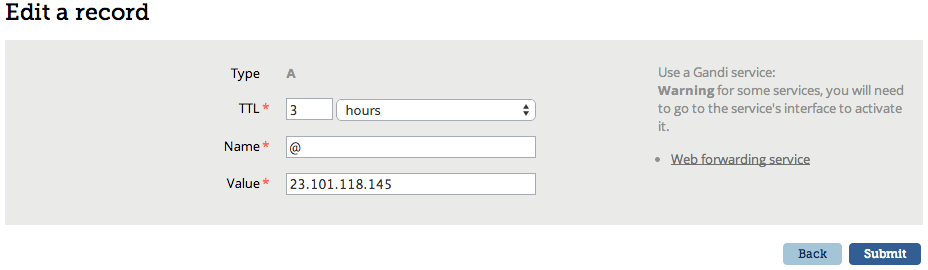
After you select "Normal" on for the Edit mode, you should see zone file editing information similar to the image below. Now you are going to edit the A record value to be the IP address that you obtained in Step 1. Click on the pencil icon directly to the far right of the A value.
This will bring you to an "Edit a record" page where you can change the listed "Value" for your IP Address from Step 1. After you've completed this click submit. Now you will need to add additional CNAME values, one at a time, by clicking on "Add" and selecting the CNAME type. Specifically you're going to want to add:
- name: awverify and the value: *your site name here*.azurewebsites.net
- name: awverify.www and the value: *your site name here*.azurewebsites.net
- name: www and the value: *your site name here*.azurewebsites.net
I added both awverify and awverify.www, such that www.gunnariauvinen.com and gunnariauvinen.com both pointed to the same place.
After you finish editing the A record and adding the new CNAME properties, your Zone file might look something like mine did after I finished my edits.
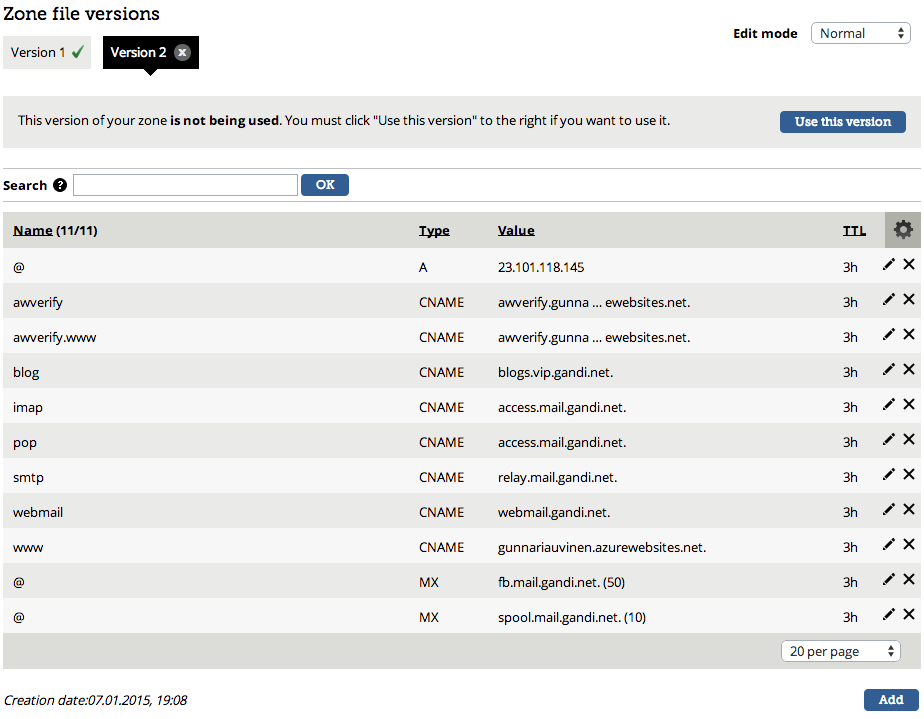
The final part of this step is to select "Use this version". Once you've successfully chosen to use your edited version of the Zone file, you'll likely see a Message at the top of the page indicating that it can take several hours for the information that you've just edited to propagate to the DNS.

Step 4: Manage Custom Domain Names on Azure
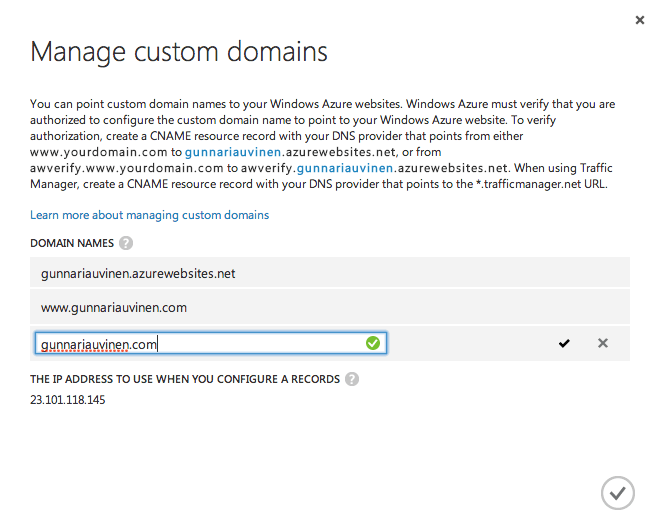
The final step is to go back into Azure and to add your custom domain names within the "Manage custom domains" window that you accessed in Step 1. As you add the custom domain names, you should see a green check mark next to the input dialogue as seen below. The first time I attempted to add my custom domain names to Azure, I waited a little over three hours and one of the two sites wouldn't verify. Given the nature of DNS propagation I decided to wait a little bit before attempting it again, at which point I was rewarded with two green check marks!
The final sweet reward is when you browse to your custom domain for the first time and your new site loads up for the first time. It was certainly a great experience for myself! Hopefully you've found this guide useful. I know that I certainly learned quite a bit while going through the process of adding my custom domain name and then writing about the experience.